
The first impression looks almost right. The second has a muddy border. By the fifth, a corner of the stamp is printing where nothing should be. It is tempting to add ink, press harder, or blame the artwork. Any of those guesses can leave you with a bigger mess.
When a rubber stamp smudges, start by separating what happens during the impression from what happens afterward. A doubled outline, ink spreading through paper, and a wet mark dragged by a finger are different problems. They need different tests.
This guide is for a stamp you already own. You will need a few scrap sheets, a sample of the material you actually want to stamp, and the instructions for your stamp and ink. Keep the good stationery out of reach until the result is repeatable. The aim is to find the cause, not to produce one lucky print.
1. Identify the kind of rubber stamp smudge
Rubber stamp smudges do not all have the same cause. Look at a fresh impression without touching it. Then compare it with one that has been handled. If the untouched mark is sharp but the handled one has a streak, investigate drying and handling first. If both look wrong immediately, inspect the shape of the mistake.
- A second outline beside the first: the stamp may have shifted or touched the paper twice.
- Fine fuzzy edges spreading into the sheet: investigate the paper and ink combination, as well as pressure.
- Small white spaces filling with ink: check ink coverage, debris, and the original design.
- One consistently pale area: check contact and pad condition before deciding the whole stamp needs refilling.
- A rectangle or corner outside the intended image: inspect unwanted ink on the plate edges and how the stamp meets the page.
These are starting points, not certain diagnoses. Two faults can occur together. A heavily inked stamp might also slide when you lift it, for example. Choose the clearest recurring fault and deal with that one first.
Keep a bad print. Put a small pencil note beside it describing what you noticed, such as “sharp before stacking” or “same gap every time.” That note is more useful than a later memory that the stamp was generally blurry. Avoid testing a fresh mark by rubbing all over it; leave part untouched so you can still see the original result.
2. Identify the stamp, not just the color of its handle
A wooden hand stamp normally takes ink from a separate pad. A self-inking stamp brings its printing plate into contact with a pad inside its mechanism. A pre-inked stamp uses a different ink-delivery arrangement, and its refill instructions may be quite different. Similar-looking housings are not evidence that two stamps take the same refill.
Find a model number, the order description, or the supplier's care instructions. If the construction is unclear, ask the supplier before taking anything apart. Do not use a video for a vaguely similar model as a reason to remove a plate or pour ink into an opening.
For a hand stamp, you can usually inspect the printing face directly. For an enclosed stamp, follow its normal inspection or pad-change procedure. Keep fingers away from moving parts, and do not force a mechanism that is sticking.
Also establish whether this stamp ever produced a clean impression on this material. A tool that worked yesterday and suddenly prints badly suggests a different investigation from a new stamp that has never printed its tiny lettering properly. A recent refill, a new batch of card, or a change of operator is worth recording. “Nothing changed” sometimes means the design did not change, while the pad or paper did.
You do not need a complete maintenance history. You need enough information to avoid testing the wrong thing.
3. Compare ordinary paper with the actual job
Set one sample of your intended material beside an ordinary, smooth, uncoated sheet that is compatible with your ink. Use the same stamp, support, and motion on both. Make a few impressions on each, leaving enough room to compare them.
This is a useful split in the investigation. If both materials show a second outline, changing the paper alone is unlikely to solve the movement problem. If the ordinary sheet prints clearly but your finished card stays wet or breaks the image into little patches, the card deserves closer attention.
Paper descriptions can be misleading shortcuts. “Matte” describes appearance; it does not tell you everything about the surface treatment. A textured sheet can interrupt contact. A very absorbent sheet can encourage ink to spread. A coating can change how an ink settles or dries. Check the ink manufacturer's compatibility guidance for the actual surface, not just the word “paper.”
Use a finished sample when possible. Blank stock before printing may behave differently from an area covered by a printed background or a finishing treatment. If you plan to stamp over a colored panel, that panel belongs in the test.
Do not jump from a disappointing paper test to a stronger solvent ink. First confirm compatibility with the stamp material, its pad, and the item being marked. A formula intended for a particular non-absorbent surface is not automatically a safe refill for an ordinary self-inking stamp.
For a mixed job, keep separate samples of the envelope, insert, and tag. One successful envelope does not approve the whole set. You may need a different working method for each item.
4. Give the stamp a flat landing and a straight exit
Test on one sheet over a stable, level work surface. Move away from the edge of a notebook, a stack of folded cards, or a table joint. Those details are easy to miss when the stamp is small and the work area is crowded.
Follow any support requirements supplied with the stamp. Some unmounted craft stamps are intended to be used with particular cushioning. Do not add a thick, soft pad to every setup as a universal cure; too much give can introduce another variable.
For the baseline print, place the stamp squarely, press with controlled even pressure, and lift without sliding sideways. Keep the paper still. If you habitually rock the handle to “get the corners,” try a normal straight impression first. Rocking changes which parts touch the sheet and can bring unwanted edges into contact.
Watch the lift as closely as the press. A stamp can begin to rise, catch at one side, and touch again. That second contact may explain a double image more clearly than the amount of ink does. Reposition the sheet so your wrist can move comfortably instead of reaching around another object.
Ask a second person to make a few prints using the same setup. This is not a contest. If their marks differ substantially, compare grip, paper support, and motion before replacing supplies. If the same missing patch appears for both people, keep that evidence for the next checks.
Do not chase perfection by stamping over a weak impression by hand. Without a positioning system, the second pass can turn a faint but readable mark into two unreadable ones. Use a fresh scrap for each diagnostic impression.
5. Check the pad before deciding it needs a refill
A dark, clogged impression is not a request for more ink. Inspect the pad using the procedure for your model. Note whether the problem began immediately after a refill or whether prints became gradually weaker over several weeks.
With a separate hand-stamp pad, aim for even coverage across the raised design. Follow the pad's instructions and use light, controlled contact rather than burying the stamp in the pad. Inspect the inked face before printing. An obvious pool in a fine gap is a reason to pause, not to press that pool onto an expensive card.
If impressions are fading, establish that the pad is actually responsible. A replacement pad of the correct model can help isolate a worn or damaged pad from other causes. Do not fit a nearly matching cartridge that changes how the printing plate contacts it.
Use only the refill specified for that stamp or pad, including the recommended color. “Black stamp ink” is not a complete specification. Follow the stated quantity and waiting instructions; this guide cannot supply one refill volume that suits every stamp.
Do not add water, cleaning fluid, or an unrelated ink to rescue a pad. If somebody has already used the wrong refill, stop and ask the supplier what can be salvaged. Repeatedly topping it up makes it harder to establish what is now inside.
Keep the last acceptable sample beside the new tests. Compare fine gaps and borders as well as overall darkness. A blacker impression can look stronger at a glance while actually losing the detail you need.
6. Remove residue without trying to erase every stain
Inspect the printing face under good light for loose fibers or built-up ink. A permanently colored surface is not necessarily dirty. Trying to restore its original color by aggressive scrubbing can damage a stamp that still prints well.
Clean only as directed for the stamp material and ink. Use a compatible cleaner and a soft, non-shedding wiping material if the instructions permit. Do not soak a wooden mount or its adhesive. Avoid knives, abrasive scraping, and improvised solvents. Some clear stamp materials can be affected by particular solvent-based inks or cleaners.
Let the stamp return to the condition specified for use before testing again. A freshly cleaned, still-wet surface is not a fair comparison with the dry stamp you tested earlier.
Photograph any suspect area before cleaning, then keep a print from afterward. Has the little gap moved, disappeared, or stayed in exactly the same place? That comparison tells you more than the appearance of the rubber alone. If removing visible debris changes nothing, stop repeating the cleaning cycle and move to the next test.
7. Check what happens between stamping and handing over
A mark can leave the stamp cleanly and still fail on its way to the customer. Think about the next few movements: sliding a tag across the counter, piling cards together, folding an envelope, or pushing a receipt into a bag.
Test those movements on spare finished material. Make several impressions and leave them undisturbed for different recorded intervals. Use a fresh sample for each handling check so an early rub does not affect a later result. Follow the ink's drying guidance, but verify the real handoff rather than relying on a generic time from another product.
Touch-dry is not the same test as surviving a stack or a tight fold. If your cards will be piled face to back, test that contact. If the stamp sits near a fold, fold the sample as it will be used. Check the neighboring surface for transferred ink as well as checking the original mark.
Leave a clear holding area for freshly stamped items. It need not be elaborate: a small part of the workbench that is not used for finished stacks may be enough. If the job has several materials, the guide to stamps for boxes, tissue, and tags can help you plan separate placements and proofs instead of treating every surface alike.
If normal handling consistently damages the mark, change the material, compatible ink system, or workflow. Do not approve a setup that only works when everyone pauses longer than the job allows.
8. Decide whether the recurring defect belongs to the design
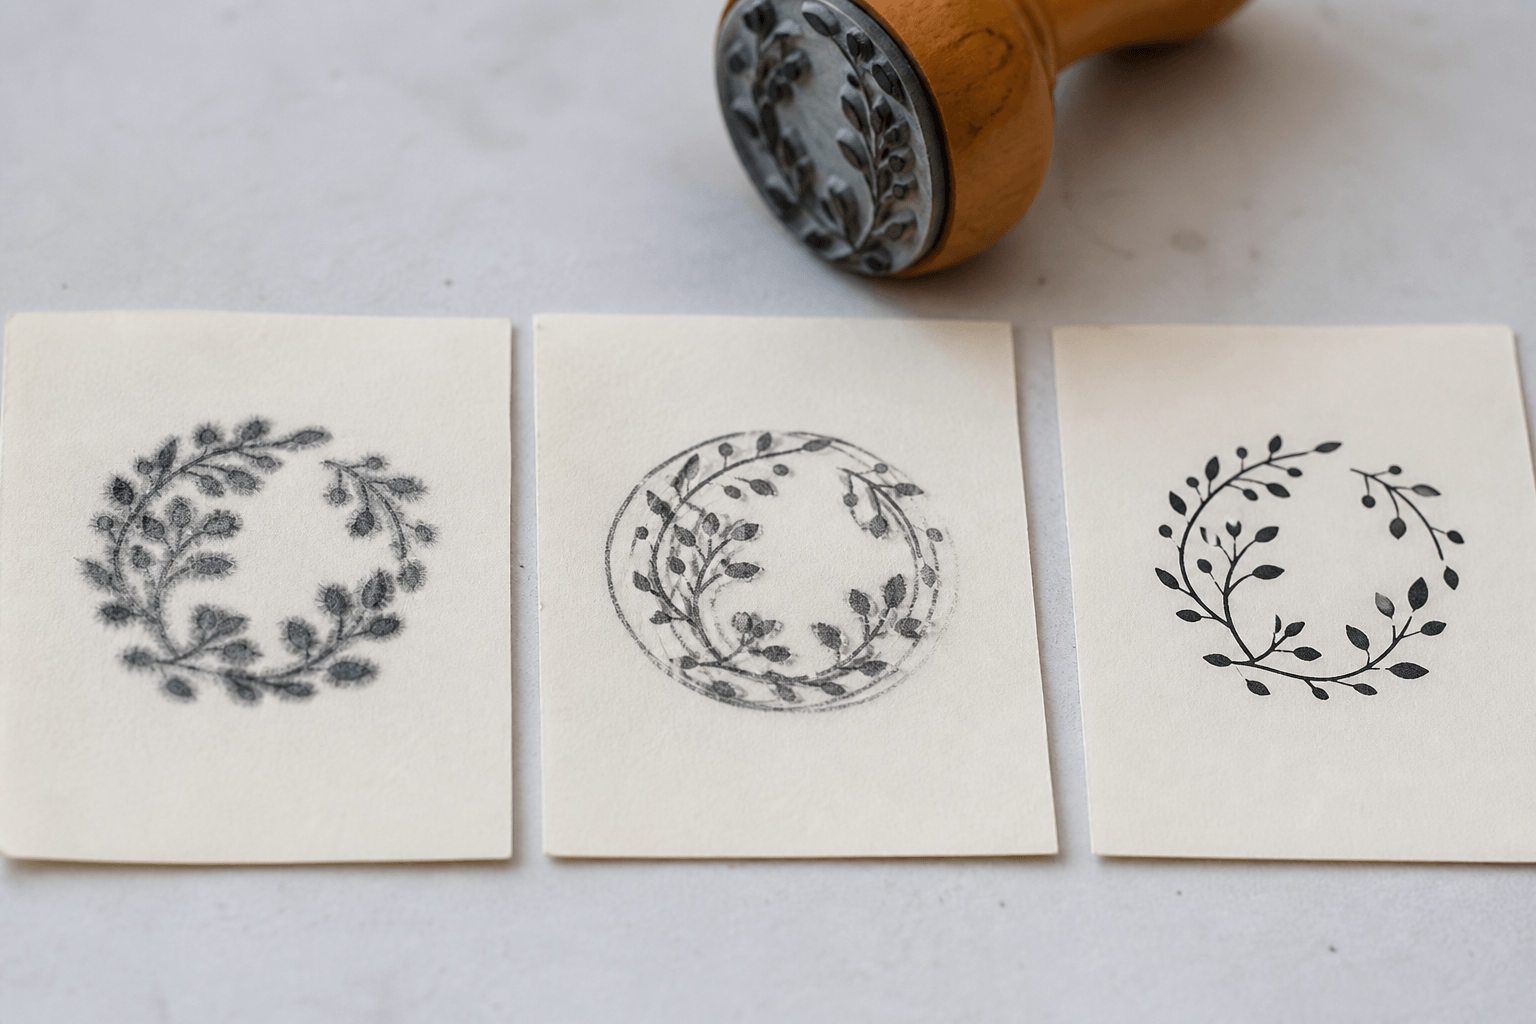
Place a clean printout of the approved artwork beside a stamp impression at the intended size. Ignore color for a moment and compare the shapes. Is a small gap already narrow in the artwork? Is the supposedly missing line absent from the file itself? Are two borders so close that a minor variation makes them appear joined?
Some weaknesses are design decisions rather than maintenance problems. A miniature slogan may ask too much of the available space. A decorative texture may resemble damage. A dense emblem may lose its open areas when reduced from a large screen preview.
Look for a pattern across the design. If broad letters print clearly but the smallest line repeatedly fills in, simplification is worth discussing. If a large blank patch interrupts both thick and thin elements, investigate contact, pad condition, or physical damage as well. Neither pattern proves its cause by itself.
Do not compensate for a crowded design by making the whole impression faint. That can open one gap while making the important name difficult to read. Instead, identify the detail that has to survive and ask whether less essential text or decoration can go.
A photograph on a phone is useful for communication, but inspect the actual paper too. Automatic sharpening, screen enlargement, and uneven light can make a tiny defect look different from the mark a reader sees. Keep the physical sample for any production discussion.
9. Give the supplier a problem they can investigate
Contact the supplier when the same defect persists after reasonable checks, when the mechanism does not move normally, or when you can see a damaged printing face. An order number and a sentence saying “it smudges” are a start, but a small evidence pack makes the conversation much more specific.
Include the model, the ink or cartridge used, the paper description, and whether the fault was present from the first impression. Send clear photographs of the whole print and the affected detail. Include a normal-size view so the supplier knows whether a flaw is visible in use or only under heavy magnification.
Describe the tests you actually performed. “The same lower-left gap appears on both papers with two operators” narrows the issue. “We tried everything” does not. Do not clean, refill, or dismantle further while waiting unless the supplier asks you to.
If the discussion points back to the source file, use the rubber stamp artwork preparation guide to review the design before ordering a replacement. Ask the manufacturer to confirm the smallest detail it can reproduce for your chosen construction and size; do not borrow a minimum from an unrelated stamp process.
Ask for a proposed next step and what would count as a successful result. That might be a correct replacement pad, a revised proof, or inspection of the stamp. Keep the approved artwork and existing physical tool until you know which part actually needs changing.
10. Work through a short fault log instead of random fixes
Imagine a shop preparing a run of card inserts. Its stamp leaves a reasonably sharp mark, but the next card in the stack picks up a gray patch. This is a hypothetical example, not a reported test. The useful clue is that the original impression looks acceptable before stacking.
The first comparison should therefore be between an untouched insert and an insert handled in the usual way. There is little reason to redraw the logo before checking that distinction. If the transfer only appears during stacking, record the waiting interval and test the finished stock with the approved ink.
Suppose a second fault appears: one employee's impressions have two slightly offset borders. Keep that on a separate line in the log. Changing the waiting interval may help the transfer without affecting the double border. The latter calls for checking the stamping motion and support.
A useful log entry needs only the sample identifier, material, ink setup, changed variable, and observed result. “Sample C: same insert and ink, flat support, straight lift; no second border” is specific enough to repeat. It does not establish that every future impression will be perfect.
Change one variable at a time when you can. If you switch paper, refill, clean, and alter pressure together, a better result gives you no clear explanation. You might also make the setup difficult for somebody else to reproduce.
Stop once you have a practical answer. You are not trying to diagnose every microscopic variation in a handmade mark. You are trying to protect the information the stamp carries and avoid spoiled work.
11. Approve a small run before returning to the full job
After the correction, stamp a short run on the actual material. Use the normal work area and handling sequence, not a special arrangement that will disappear as soon as the test is over. Inspect the beginning and end of the run.
Look for readable text, open spaces, a stable outline, and no unacceptable transfer during handling. A little natural ink variation can be fine for a decorative mark. A missing digit, merged initial, or ambiguous status is not the same sort of variation.
Keep one approved sample near the workstation and record the working combination of stamp, pad, ink, and stock. Put the correct refill information somewhere the next person will find it before reaching for a bottle.
The next time a rubber stamp smudges, start with that known good sample and the last thing that changed. You will have a useful comparison immediately, and a much better reason for your next move than “perhaps it needs more ink.”